|
Belt Transmissions
MEASUREMNT OF VIBRATION AND ASSESSMENT OF THECHNICAL CONDITION OF BELT TRANSMISSIONS
The measurement is limited to that of physical quantities which can be used to define and evaluate unambiguously the belt’s transmissions vibration condition.
Belt transmissions are mechanical devices which transmit energy. They can absorb shock loads occurring in machinery and block the reciprocal transfer of vibration existing in combined machines. Basically, two types of issues are connected with belt transmissions: reaction of the belt to variable exciting forces generated in the machine and vibrations of the very belt. For example, angular omega replica watches and parallel displacement of the pulley, its eccentricity and damage to its bearings give rise to vibrations. These faults cause axial and radial vibrations having the same frequency as the exciting force, centerforcommunitysafety or its multiplied frequency. Due to that, the belt wears faster. The vibration which is caused only by the belt’s defect will be characterised by frequencies whose values correspond to a multiplied number of the belt’s revolutions per minute: usually it is 1, 2, 3, 4 x the number of the belt’s RPM.
Such measure is conducted in order to:
- Locate the sources of vibrations and determine their causes,
- Assessment of the wear of the pulleys’ bearings and monitoring of vibration phenomena which may cause the wear,
- Assessment of the vibration state of the drive shaft and the driven shaft - current condition compared to the history of the belt transmissions condition,
- Collect data to make a complete analysis of the vibration state: current condition compared to the history of the machine,
- Interpret the vibration state observed: current condition compared to the history of the machine,
- Make a diagnosis regarding the technical state of the turbo set: current condition compared to the history of the machine,
- Make a forecast about the future technical state: current condition compared to the history of the machine,
- Indicate causes of the aggravation of the belt’s rtansmissions vibration condition,
- Make suggestions as to actions aimed at reducing the belt’s rtansmissions vibration,
- Prepare data concerning the time-span necessary for the repair and its scope.
 |
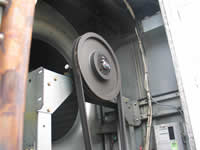
| Measurement of the driven wheel’s vibration |
Type and Scope of Measurement
We conduct measurements on machine sets which are operating or disabled.
Measurement of an operating turbine set’s vibrations is conducted with:
- a monitoring unit mounted permanently: the so-called belt transmissions set monitoring system,
- sensors of a stationary monitoring system mounted on the toothed belt transmissions set,
- a measuring system installed by us for a longer period of time,
- a measuring system installed by us for a period during which the measurement is carried out,
- a portable measuring apparatus.
In each of the above cases, if necessary, the measuring system can be supplemented with sensors essential for obtaining the best description of the toothed belt transmissions set’s technical condition.
The scope of measurement we conduct depends on requirements, objectives and a technical problems occurring while the toothed belt transmissions set is operating.
Depending on the scope of the measurement, we are able to indicate and inspect the following basic belt transmissions of the fan set:
- Flaws of the rotating system’s balance,
- Alignment and perpendicularity faults of the mating pulleys,
- Eccentricity of the mounting on the shaft of the mating pulleys,
- Seizures in the seals,
- Looseness in bearing supports,
- Looseness in the mounting of the mating pulleys’ bearings,
- Misalignment at the input and output shafts,
- Faults stemming from mistakes made during the production of the pulleys,
- Thermal deformation of the mating elements,
- And many more.
Inspection of the disabled belt transmissions is aimed at:
- Inspection of the mounting and support elements of the mating pulleys,
- Assessment of the current condition of the transmission.
 |
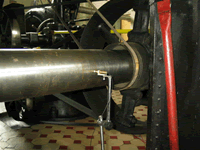
| Transmission belt of the turbine control system |
We also determine the frequencies of free vibrations of the belt’s transmissions elements. We this provide a team of operators with the knowledge of what ranges of inducement frequencies are dangerous for the belt transmissions. Such measurement is aimed at improving the safety of operation.
The VIBROPOMIAR Company also maintains a measuring team which responds to emergencies. It conducts limited measurement consisting of the evaluation of the system’s vibration condition. This measurement serves the purpose of assessing the fitness of the gear for further operation and enables the evaluation of its general technical condition.

|


