|
Toothed gears
MEASUREMENT OF VIBRATION AND ASSESSMENT OF TECHNICAL CONDITION OF TOOTHED GEARS
The measurement is limited to that of physical quantities which can be used to define and evaluate unambiguously the gear’s vibration condition.
Such measurement is carried out in order to:
- Locate the sources of vibration and determine their causes,
- Estimate the level of the wear of the gear’s teeth and inspect the vibration phenomena causing the wear,
- Assess the vibration condition: current condition compared to the history of the gear condition,
- Collect data to make a complete analysis of the vibration state: current condition compared to the history of the gear condition,
- Interpret the vibration state observed: current condition compared to the history of the gear,
- Make a diagnosis regarding the technical state of the gear - current condition compared to the history of the changes occurring in the gear,
- Make a forecast on future technical condition – current condition compared to the history of the gear condition,
- Indicate causes of the aggravation of the gear’s vibration condition,
- Make suggestions as to actions aimed at reducing the gear’s vibration,
- Prepare data concerning the time-span necessary for the repair and its scope.
 |
 |
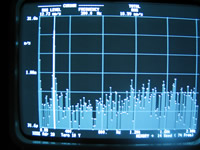
Examples of vibration spectra of intersecting axis gear’s casing
Type and Scope of Measurement
We conduct measurements on machine sets which are operating or disabled.
Measurement of an operating turbine set’s vibrations is conducted with:
- a monitoring unit mounted permanently: the so-called turbine set monitoring system,
- sensors of a stationary monitoring system mounted on the toothed gear set,
- a measuring system installed by us for a longer period of time,
- a measuring system installed by us for a period during which the measurement is carried out,
- a portable measuring apparatus.
In each of the above cases, if necessary, the measuring system can be supplemented with sensors essential for obtaining the best description of the toothed gear set’s technical condition.
The scope of measurement we conduct depends on requirements, objectives and a technical problems occurring while the toothed gear set is operating.
Depending on the scope of the measurement, we are able to indicate and inspect the following basic toothed gears of the fan set:
- Flaws of the rotating system’s balance,
- Alignment and perpendicularity faults of the mating toothed wheels
- Eccentricity of co-operating toothed wheels,
- Seizures in the leak stoppers,
- Looseness in bearing supports,
- Looseness in the mounting of mating toothed wheels’ bearings,
- Misalignment of the gear with the unit at the input and output shafts,
- Faults stemming from mistakes made during the production of teeth,
- Thermal deformation of mating elements,
- And many more.
Inspection of the disabled gear is aimed at:
- Examining the surfaces of the mating toothed wheels,
- Examining how mating toothed wheels are mounted and supported,
- Assessing the technical condition of the gear’s body.
 |
 |
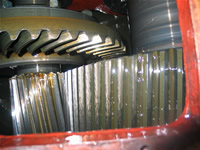
| Traces of mating |
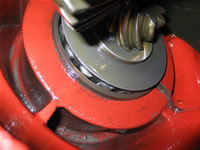
Support of the pinion |
We also determine the frequencies of free vibrations of the gear’s elements. We this provide a team of operators with the knowledge of what ranges of inducement frequencies are dangerous for the gear. Such measurement is aimed at improving the safety of operation.
The VIBROPOMIAR Company also maintains a measuring team which responds to emergencies. It conducts limited measurement piaget replica watches consisting of the evaluation of the system’s vibration condition. This measurement serves the purpose of assessing the fitness of the gear for further operation and enables the evaluation of its general technical condition.

|


